Image Map
Showing posts with label diy. Show all posts

DIY "Pull Down" Map

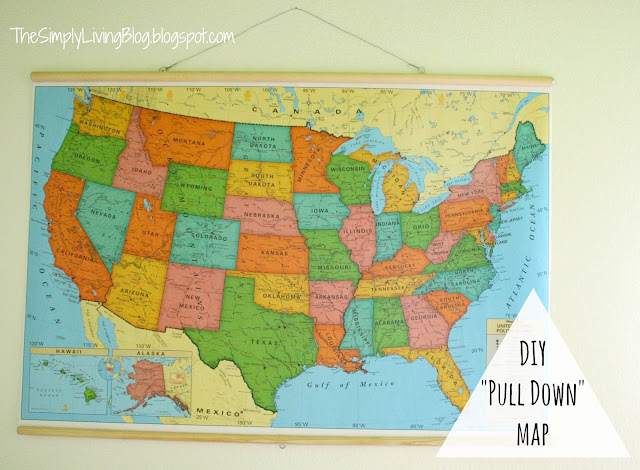
Hi there! I shared my son's bedroom makeover a few weeks ago, and one of my favorite DIY projects for the room was this faux "pull down" map.  I love the trend I have seen around lately using maps, my son loves maps so I knew I wanted to add one in his room.  As I looked for a real working pull down map to buy, I realized how expensive they were, since I had a small budget for this makeover I decided to try and make one that gave the look of the pull down.  This was super easy!

First off I found a map on Amazon, I was beyond thrilled when I found it because of the bright colors that matched the color scheme for the room.  To top it off it was only $6.00! Yes! I got it even if my idea didn't pan out like I planned.  When it came I realized it was pretty thin paper (hence the reason it was so cheap) so I had to be super careful to not crease it as I was working on it.
(I looked for the map I bought but can't find it on Amazon now, but this one is very similar.)

Once the map arrived I bought dowel rods from Home Depot.  I got one 1" diameter for the top and a 1'2" one for the bottom of the map.

I screwed a washer and a 1'2" screw into the ends to give it a little more mechanical feel.  I had to screw it in slowly in order for it not to split the dowel.

After I had the screws in the ends, I took the 1'2" (bottom) rod and marked the middle. Then attached a picture hanger with the screws, to look like a pull down tab.

For the 1" (top) rod I measured one forth of the way from both ends and screwed a picture hanger in, for the map to actually be hung with.

Next, I carefully laid my map out on the ground and lined up the rods across the top and bottom. I had to trim the sides of the map a little to make sure it was the exact same width as the rods.
Then, I used a tacky craft glue to attach the map to the back side of the rods.
When gluing the top rod on, I made sure the picture hangers were towards the back so the screws would be touching the wall when it was hung, that way it would hang flat.
Finally, when the glue dried I attached picture hanger wire to the top two hanger tab things. (Very technical term) ;)  I'm so in love with how it turned out!  It's big and bright and perfect for the space.
I might just do another one for somewhere else in our house because I love it so much! 
Pin It!

DIY Floating Shelves

Hi! Today I am sharing how I made those floating shelves in my sons bedroom makeover I posted about the other day.  This was so simple and so cheap, my two favorite things in DIY. :)
So first off, I went to Goodwill and found a book for .99 cents.  I needed the book to be pretty big but not too big.  The one I found is about 13" x 9".
Once I had my book I headed to the hardware store and bought a 4" L bracket and 1/2" screws.
I got the 1/2 screws because that was about how thick the book I found was.  If you have a thick book you may want to use longer nails.

Once I had my materials I was ready to drill! I opened up the back cover of the book and placed the L bracket facing down to the ground. Then just screwed my screws straight into the book.  I had to hold the pages down tightly so the screw would go all the way, but made sure it didn't come out the front cover of the book.
(*note: if I was doing this again I would use two brackets spaced apart for more stability once its on the wall.)    
After I got the bracket screwed into the book I simply used hot glue to attach the back cover and hide the bracket.
When the glue was dry I was done and it was ready for the wall!
I anchored my screws into the wall when I hung them up.   And added all of Carter's favorite books! This is such a fun element, and the fact it was so easy and inexpensive makes it even better! 

Visit thecsiproject.com
Pin It!

DIY Painted Wall Art

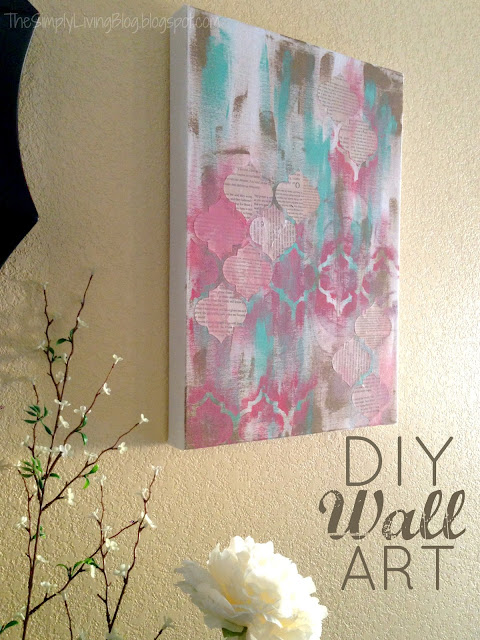
I have slowly been changing the colors in our living room.  It was basically brown and beige, pretty dark and   has been the same since the time we moved in almost 5 years ago.  I am working to make it brighter and cheerier than the dull browns and khakis it had going on.  I have been incorporating whites, blues and other bright colors to do that, and last week I created a piece of wall art that was really easy and helps add the brightness I am looking for!

  Originally, I had these two wooden pieces hanging on either side of a large mirror.  They were just hollow wood with a fleur-de-lis carved into them, I got them on clearance from Hobby Lobby years ago.  
  After seeing this piece of art,  I fell in love and I was inspired to just make my own art using paint and paper to replace the fleur-de-lis.
I didn't want to spend a lot so, instead of buying canvases, I just took the two existing pieces and covered them in a canvas material using my staple gun, and it worked out great thankfully! 


Once I had the pieces covered in the canvas fabric, I brushed on a brown/gold acrylic paint randomly all over, the fabric absorbed the paint pretty quickly so it didn't spread as much as I was expecting it too but I think it helped give it the aged and worn look I was going for, luckily, so I went with it.
After I had the goldish color on, I topped it with a aqua color, randomly covering the whole thing going over the gold in some places. 
Next, I used a quartrefoil stencil I had left over from something else, I placed it asymmetrically on the canvas and painted over it with pink, adding the pink color all over as well.
All of the colors start blending together and fading off each other creating a neat effect.
Finally, I used the same stencil to cut out book pages. I modge podged them on and mixed a tiny bit of paint with the glue so the pages would look like are aged as well, almost like they are being exposed from underneath. 
I also very lightly used sand paper on some parts of the paper.  
I really like how this turned out, and I am not a painter, usually every time I try to paint something on a canvas it looks like my 4 year old did it, lol.  Since this is an abstract piece even mistakes can look like they were meant to be.


I just love these bright colors and they tie in nicely with the scarp paper art I made for the wall across the room from these.


I want to make a few pillows and paint a table then I think I will be finished with the living room.  So hopefully I get those things accomplished before I decide to switch things up again. Ha!

post signature
Pin It!

Simple {and cheap} Gallery Wall


Gallery walls are everywhere right now, and I cannot get enough of them!  They are so great because each and every one is different.  You can customize it to any size of wall or area.  They are just about the most versatile way to cover a large space in your home.   I already have two in my house and am thinking about doing another!
Although, I am always drawn to symmetry, and after looking around my house I realized every wall was symmetrical! It's not that I did this on purpose, I just really like things to be in line and balanced! Maybe it's the Libra in me. ;)
Here are just a few examples around our house of my balanced obsession.

Ok... I see a theme here, so once I realized that all of my walls were basically the same, I decided to do something different in our bathroom.  I was so excited about this easy project because it was so CHEAP! And all it took was a can of spray paint and some old frames.  I am always picking up frames at garage sales and thrift stores because they are usually always under a dollar.

After I spray painted all of the frames, which were different sizes and shapes, I arranged them into what I thought would look the best.  Even though gallery walls aren't always symmetrical, I still wanted to have balance.  I tried to evenly distribute the size of the frames and the shapes to create that.   I arranged them on the floor, and took a picture to use as a guide when hanging them.  And yes, that is carpet in a bathroom, yuk! Who puts carpet beside a bathtub??   I guess the builder didn't think about a 2 year old taking a bath in there and making a wave pool out of it, sometimes  I think I should wear a swim suit just to give him a bath so you can imagine how the carpet looks when we're done! lol!


So anyway, you can also use paper as a guide to hanging, but that was an extra step in the process I didn't do because the quicker the better for me!
Usually I start projects out just as a test, and those seem to be the ones I like the most.  That was the case with this project.  I just kind of eyeballed it instead of pressuring myself to make it perfect, and I love how it turned out!
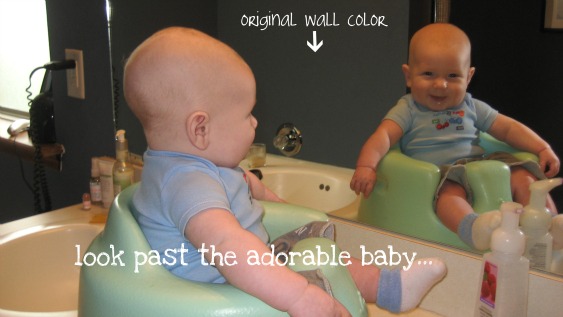
Now I don't have a before picture of our bathroom but I will give you this picture and you can see what color was on the walls before.  Dark Blue.  ugh.  It was like a cave in our bathroom, it is already small and the dark paint closed it in even more. Not only that, it was flat paint, so every little water spot showed.  That will be the last time I buy a can of paint just because it's on clearance for $5. Just saying. ;)
Warning: adorable baby alert - this is the only picture I could find of our bathroom, plus it gives me an excuse to reminisce about how my tiny, chubby baby is already 3. years. old.  whaa.
If you were able to look past the chubby baby smiling adorably at you, then you can see how dark the paint was to begin with! I'm so glad it's gone!   
We painted over this with primer first, then painted it a light blue.  

Ok, now I have the frames painted, arranged, and hung and this is how it looks!   So much brighter, cheerier, bigger, and just overall makes me happy when I walk in there!  

This was one of the cheapest things I could have done as a DIY wall decor, which makes me love it even more than I already do! The total cost was around $8 I think.  But to have a bathroom that is soft, relaxing, and makes me sigh when I look at it, is priceless! :)
Thanks for stopping by and checking it out! 
Photobucket
Pin It!

Monogrammed pillowcase {and bag}

Last weekend my oldest niece turned 8 years old.  I really wanted to make her something so I thought it would be cute if she had a personalized pillow and bag she could take to slumber parties and stuff, since she's at that age now.

I bought a pillow case and canvas bag from Hobby Lobby, they have different colors in their crafting section.  Then I bought coordinating fabric, ribbon, and embellishments. 

I discovered iron transfer paper for this project.  I don't know where I have been, but this stuff is awesome! I am not a seamstress so this makes life SO much easier! 

So first I ironed on the transfer paper according to the directions that came with the paper, mine said iron on the rough side to the back side of the fabric.
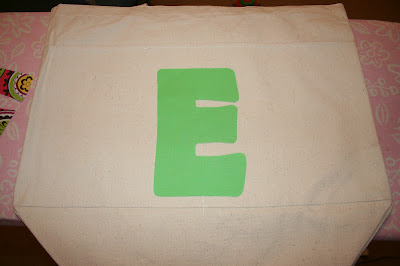
I cut out EMMA from card stock to use as a stencil, once the transfer paper was ironed on I cut around the letter. 

Ok so this may be a really weird technique, but I found that if I tape all the sides of the letter to the fabric it was so easy to cut out, it stayed in place and the scissors worked better cutting through the tape.


After I had the letters cut I simply ironed them on to the pillowcase and canvas bag.  Then I did do a little sewing for the ribbon on the pillowcase (thanks Jes!), this could have been ironed on as well.  But I did just iron on the pink rose ribbon across the top of the bag.  That's it! Alright, this did take some time, but it was all super easy to do!

So cute! I loved this pink paisley pattern with the green! I think she liked it too!! :)


I love that iron on transfer paper so much! I can't wait to use it on other pillows for myself! I feel like as much as I like to craft and stuff why didn't I know about it sooner?? lol

I'm so glad Emma loved it as much as I loved making it!


Craftomanic ~  The DIY Showoff ~  Under the Table DreamingToday's Creative Blog ~  Tip Junkie ~  Blue Cricket Designs ~  Organize Your Stuff Now ~  Shabby Creek Cottage ~  The Crafty Blog Stalker ~  The Crafty Nest ~  Shabby Art Boutique ~ The Artsy Girl Connection ~ Southern Lovely ~ Between You and Me ~ Thrifty Decor Chick ~ Junk in Their Trunk ~ It's Overflowing


Photobucket
Pin It!

Wedding Shower

I love planning showers or birthday parties. I could do it everyday! One of my best friends is getting married in October and a few weekends ago the four of us bridesmaids threw her a shower! Here are a few DIY details we put together.
&<span class=
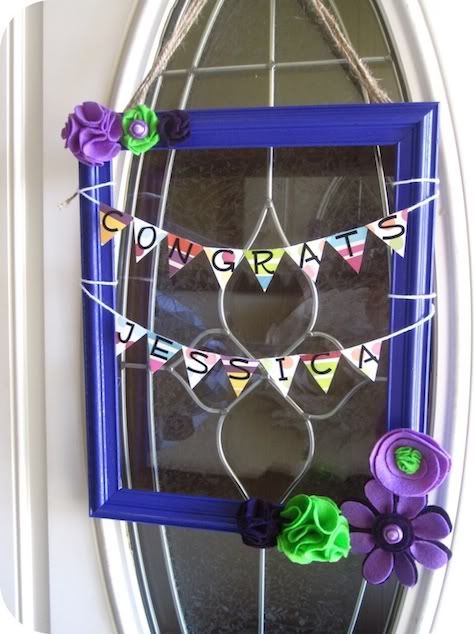
This welcome sign was made with a frame from the thrift store I sprayed purple.  The triangles are scrapbook paper and I used my handy silhouette machine for the letters, then just glued the triangles onto yarn to tie across.  The flowers are made of felt.  I think the total for this sign was under $5! Oh yeah! I love how it turned out!


We hung up old pictures of the bride and groom and had everyone guess their ages.  It was fun seeing their cute baby pictures!

Photobucket
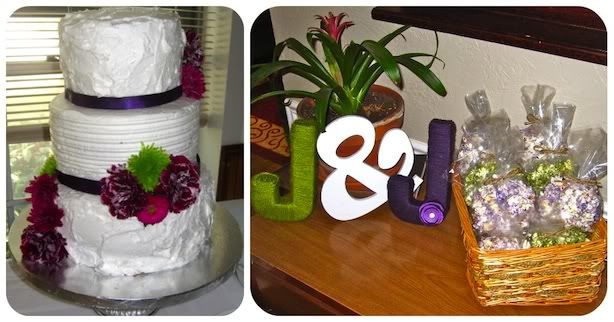
The Maid of Honor, Alli, and I made the cake. This was actually one of the simplest cakes I have made. We just textured regular butter cream icing with a spatula and another cake tool that made the lines. It took lots of icing! But, if we didn't like how it looked we could smooth it out and start over. With the fresh flowers, so pretty!

I got a couple of cardboard J's from the unfinished wood section at Hobby Lobby and wrapped them in yarn. LOVE! :) I love the warm and cozy feeling yarn gives off. Then there is the purple and green kettle corn party favors. My girl Jennie did these and they were so good! She and Katy did all the food which was awesome as well.

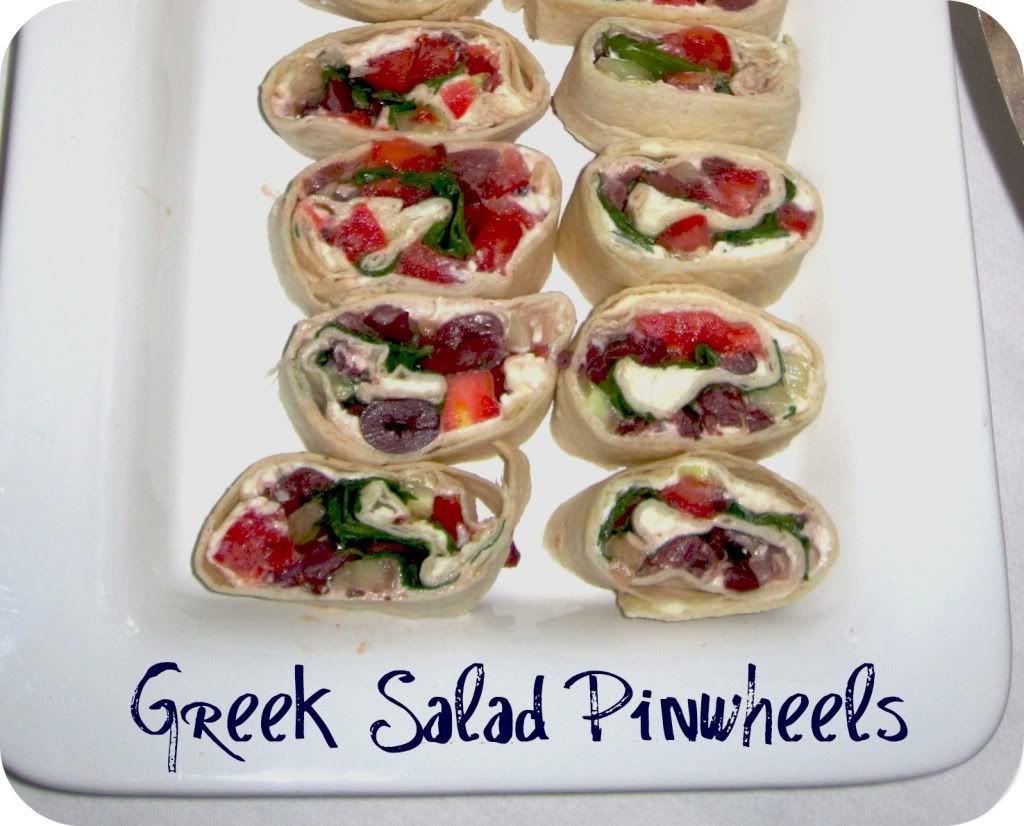
These pinwheels were one of the delicious things they made, the mix of the salty kalamata and the sweet tomato was an explosion of flavor! I may have had more than a few. a lot more ;)


Photobucket


1 container (8oz) garlic and herb whipped cream cheese
1 container (4oz) crumbled feta cheese
1/3 cup finely chopped cucumber
6 flour tortillas for burritos, 8 inch
1/3 cup pitted kalamata olives, coarsely chopped
3 small (Roma) tomatoes, chopped (about 1 1/2 cup)
3 cups baby spinach leaves

Directions:
In a small bowl, beat cream cheese and feta cheese with electric mixer on medium speed until smooth. Stir in Cucumber.
Place tortillas on microwavable plate or paper towel; microwave uncovered on high 10 - 15 seconds to soften. Spread about 1/4 cup cheese mixture on each tortilla. Top evenly with olives and tomatoes. Arrange 1/2 cup spinach on each tortilla to within 1/2 inch of edge. Roll up tightly wrap in plastic wrap. Refrigerate 2-3 hours to blend flavors.
Trim ends of rolled tortillas if desired. Cut each roll into 8 1 inch slices. Arrange with cut side down on serving dish.
Each pinwheel = 45 calories


Great Success! 
Photobucket

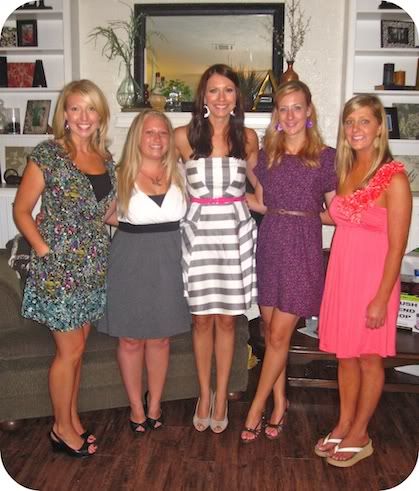
Katy, Jennie, Bride to Be Jessica, Me, Alli
I am lucky to have such creative friends to do these showers with!
 It doesn't take much to put a little extra love into the details, it certainly makes things more special :)


Linking to...


Pin It!