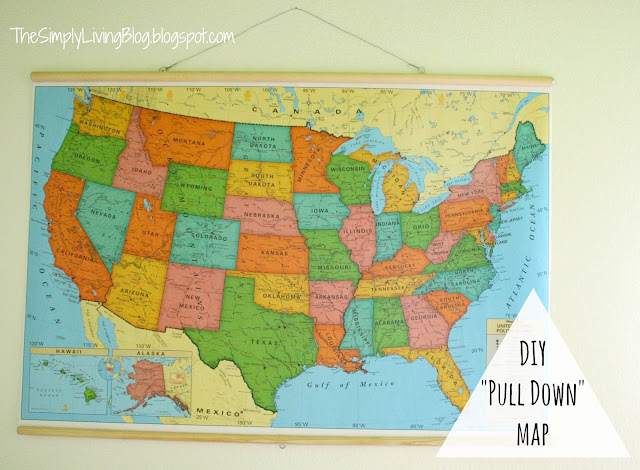
Hi there! I shared my son's bedroom makeover a few weeks ago, and one of my favorite DIY projects for the room was this faux "pull down" map. I love the trend I have seen around lately using maps, my son loves maps so I knew I wanted to add one in his room. As I looked for a real working pull down map to buy, I realized how expensive they were, since I had a small budget for this makeover I decided to try and make one that gave the look of the pull down. This was super easy!
First off I found a map on Amazon, I was beyond thrilled when I found it because of the bright colors that matched the color scheme for the room. To top it off it was only $6.00! Yes! I got it even if my idea didn't pan out like I planned. When it came I realized it was pretty thin paper (hence the reason it was so cheap) so I had to be super careful to not crease it as I was working on it.
(I looked for the map I bought but can't find it on Amazon now, but this one is very similar.)
Once the map arrived I bought dowel rods from Home Depot. I got one 1" diameter for the top and a 1'2" one for the bottom of the map.
I screwed a washer and a 1'2" screw into the ends to give it a little more mechanical feel. I had to screw it in slowly in order for it not to split the dowel.
After I had the screws in the ends, I took the 1'2" (bottom) rod and marked the middle. Then attached a picture hanger with the screws, to look like a pull down tab.
For the 1" (top) rod I measured one forth of the way from both ends and screwed a picture hanger in, for the map to actually be hung with.
Next, I carefully laid my map out on the ground and lined up the rods across the top and bottom. I had to trim the sides of the map a little to make sure it was the exact same width as the rods.
Then, I used a tacky craft glue to attach the map to the back side of the rods.
When gluing the top rod on, I made sure the picture hangers were towards the back so the screws would be touching the wall when it was hung, that way it would hang flat.
Finally, when the glue dried I attached picture hanger wire to the top two hanger tab things. (Very technical term) ;) I'm so in love with how it turned out! It's big and bright and perfect for the space.
I might just do another one for somewhere else in our house because I love it so much!
Thanks for checking it out!!

Linking up here...
Craftomanic ~ Under the Table Dreaming ~ Today's Creative Blog ~ Tip Junkie ~ Organize Your Stuff Now ~ Shabby Creek Cottage ~ The Crafty Blog Stalker ~ See Vanessa Craft ~ Southern Lovely ~ Grits and Giggles ~ Thrifty Decor Chick ~ It's Overflowing ~ Creatively Living ~ 52 Mantles ~ 30 Handmade Days ~ The CSI Project ~ The DIY Dreamer
~ Tatertots and Jello


Thanks for the tutorial! I had actually been wanting one in our home for awhile and didn't like the prices either. I may have to make one now. I also love the colors of the one you found!
ReplyDeleteLove this! That map is amazing, the colors are perfect for the space! You get a chance, please link up to the Suburbsmama Sunday Linky Party: http://suburbsmama.blogspot.com/2013/09/sunday-linky-26.html
ReplyDeleteSo cute! Love the green and orange! Pinned for inspiration for my boy's "big boy" room since those are the colors we're working with! You've done a great job at paying attention to the details, I really love it!
ReplyDeleteGreat tutorial and looks authentic just like original pull down maps
ReplyDelete